
Use the Configuration tab in the Registration module to set up the display and edit settings in 'View tabs' to suit you:

The view tabs offer a variety of layout options for registration records and different methods of managing registration information. You may find it useful to familiarise yourself with the tabs and decide which to use.
To configure the view tabs:
- Open the Registration module and select the Configuration tab.
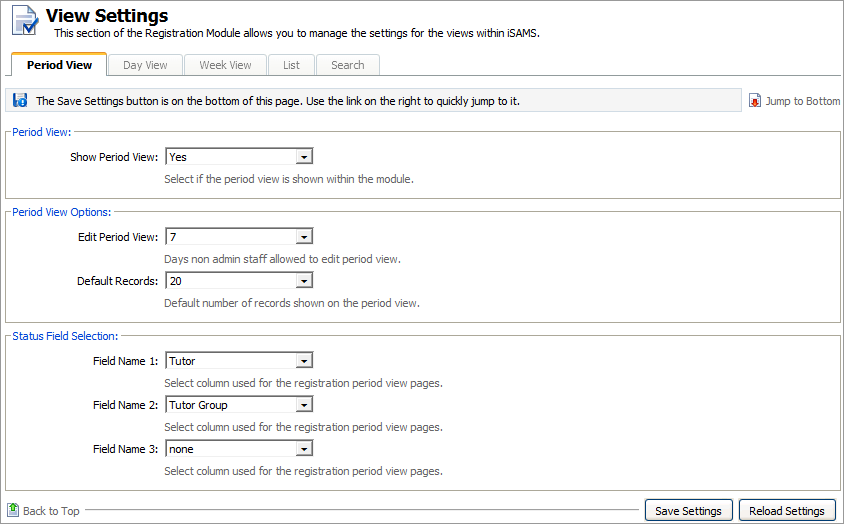
Select View Settings from the right hand menu to display this screen:
Click on a tab in the View Settings screen to configure the corresponding view tab in the Registration module:

The Period View tab displays a comprehensive view of registration records where you can edit records outside of registration times. The Period View tab is useful when you want to view record details such as notes and reasons for absence.
Work through the settings shown:
Setting
Explanation
Period View
Use the drop down list to select whether the Period View tab displays in the module.
Period View Options
- Edit Period View. Use the drop down list to select the number of days users with read/write access can scroll back from today's date and edit registration records. This does not affect the number of days you can scroll back to view registration records.
- Default Records. Use the drop down list to select the number of records displayed under each registration period listed. You can move between pages of registration records listed for each period using the navigation tools available.
Status Field Selection
Use the drop down lists to select extra data columns, such a pupil's boarding house, to display in the Period View. This is optional.
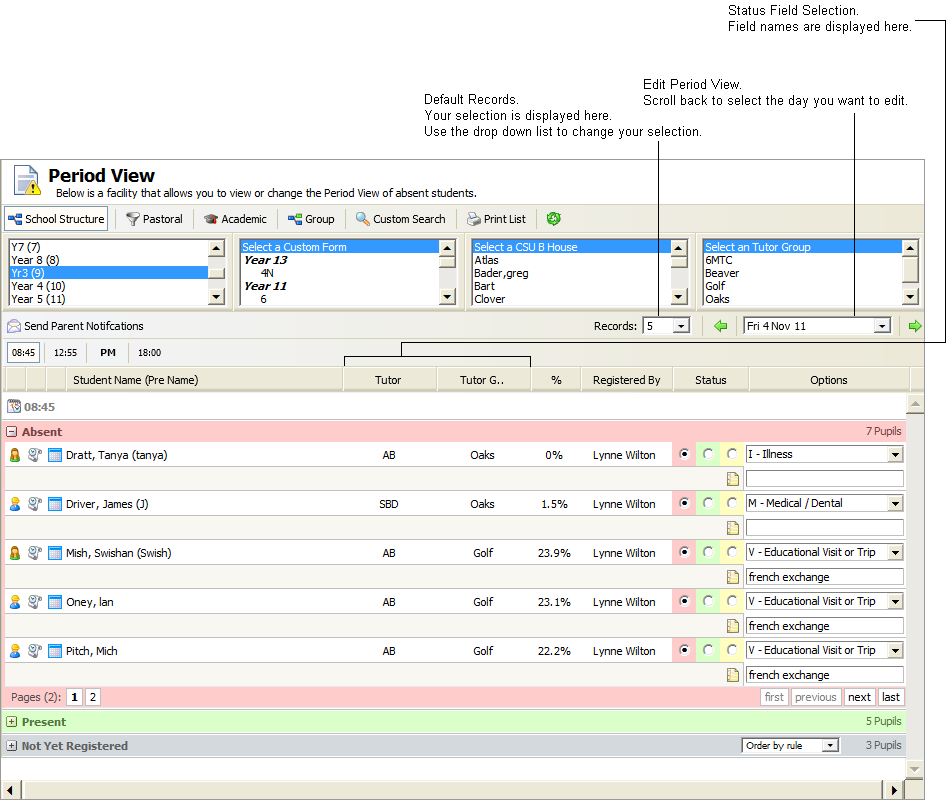
Here is an example of how your selections are shown in the Period View tab:
When the details are as required, click Save Settings.
Use the Reload Settings button to cancel any changes you have made to these settings, i.e. reset the values as they were when you first accessed this form. The Reload Settings button only cancels changes if you have not already saved them.
The Day View tab displays registration records by a selected day where you can edit records outside of registration times. The Day View tab display is similar to a traditional paper based register.
Work through the settings shown:

Setting
Explanation
Day View
Use the drop down list to select whether the Day View tab displays in the module.
Day View Defaults
- Records. Use the drop down list to select the number of records displayed for each day at any one time. You can move between pages of registration records listed for each period using the navigation tools available.
- Times. Use the drop down list to select the registration times displayed for each day. You can still hide registration times from your screen when you are working in the tab.
Status Field Selection
Use the drop down lists to select extra data columns, such a pupil's boarding house, to display in the Day View. This is optional.
Here is an example of how your selections are shown in the Day View tab:
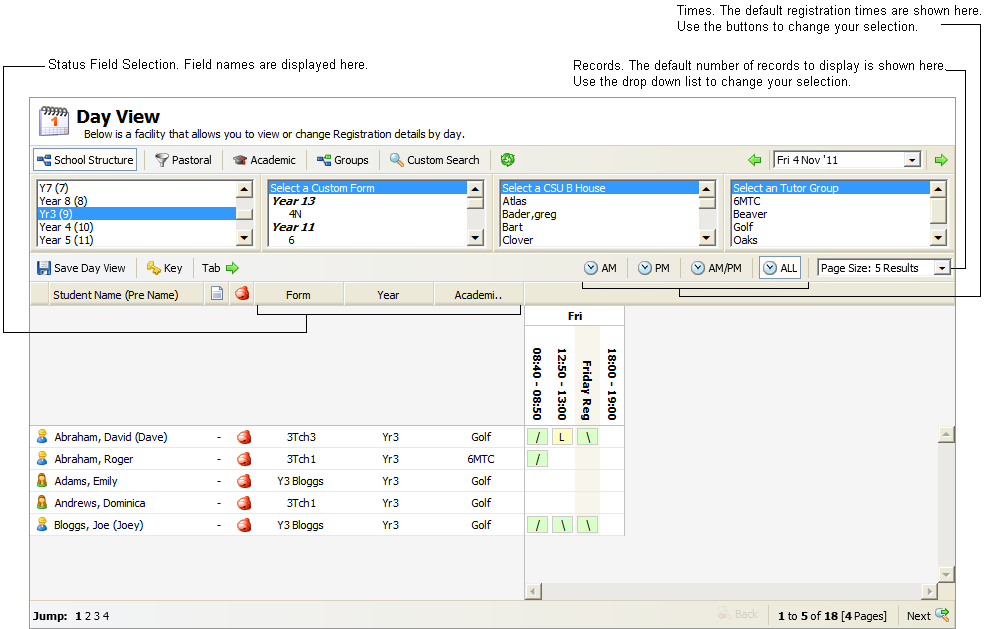
When the details are as required, click Save Settings.
Use the Reload Settings button to cancel any changes you have made to these settings, i.e. reset the values as they were when you first accessed this form. The Reload Settings button only cancels changes if you have not already saved them.
The Week View tab displays records by a selected week where you can edit records outside of registration times. The Week View tab display is similar to a traditional paper based register.
Work through the settings shown:

Setting
Explanation
Week View
Use the drop down list to select whether the Week View tab displays in the module.
Defaults
- Records. Use the drop down list to select the number of records displayed for each week at any one time. You can move between pages of registration records listed for each period using the navigation tools available.
- Times. Use the drop down list to select the registration times displayed for each week. You can still hide registrations times from your screen when you are working in the tab.
Field Selection
Use the drop down lists to select extra data columns to display, such a pupil's boarding house, in the Week View. This is optional.
Here is an example of how your selections are shown in the Week View tab:
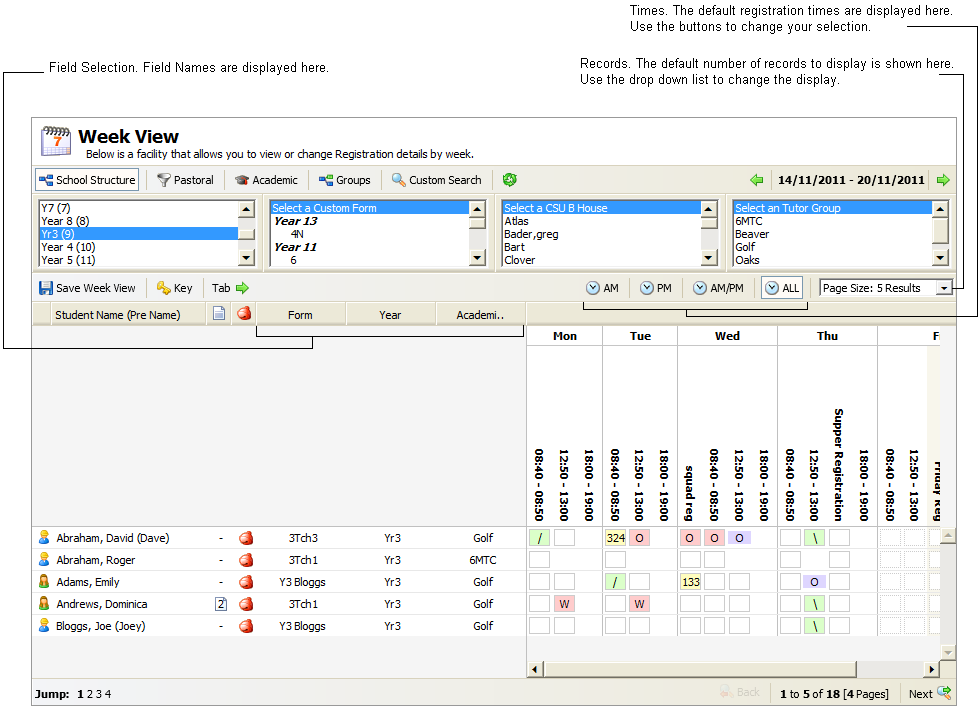
When the details are as required, click Save Settings.
Use the Reload Settings button to cancel any changes you have made to these settings, i.e. reset the values as they were when you first accessed this form. The Reload Settings button only cancels changes if you have not already saved them.
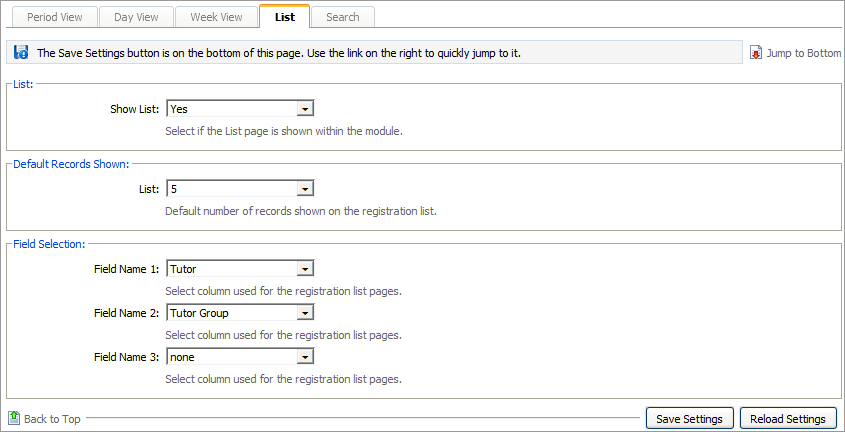
The List tab displays a selection of registration records where you can edit records outside of registration times.
Work through the settings shown:
Setting
Explanation
List
Use the drop down list to select whether the List tab displays in the module.
Default Records Shown
Use the drop down list to select the number of records displayed in the List tab at any one time. You can move between pages of registration records listed for each period using the navigation tools available.
Field Selection
Use the drop down lists to select extra data columns to display, such a pupil's boarding house, in the List tab. This is optional.
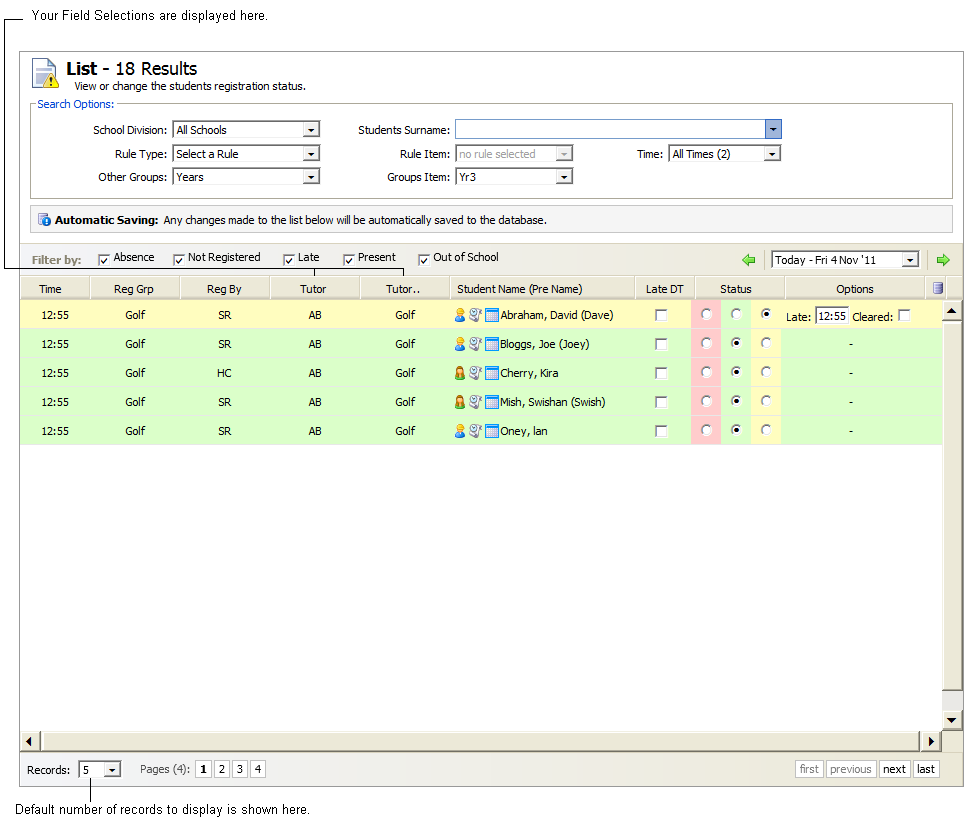
Here is an example of how your selections are shown in the List View tab:
When the details are as required, click Save Settings.
Use the Reload Settings button to cancel any changes you have made to these settings, i.e. reset the values as they were when you first accessed this form. The Reload Settings button only cancels changes if you have not already saved them.
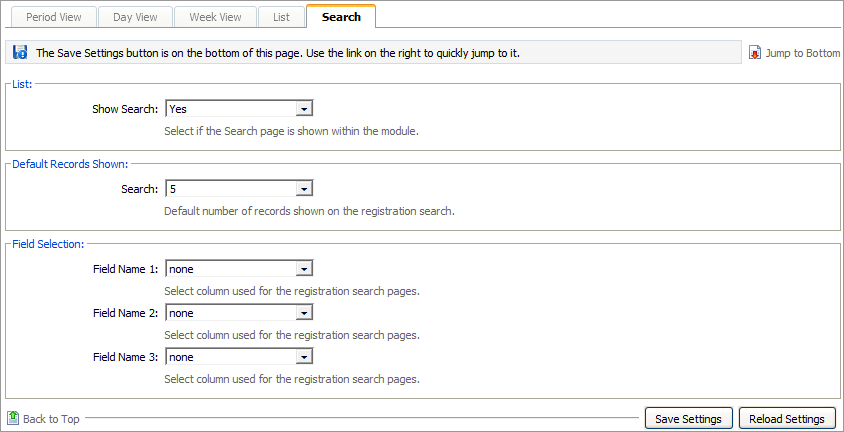
Use the Search tab to generate a mail merge to send to parents.
Work through the settings shown:
Setting
Use drop down lists to select...
List
Whether the Search tab displays in the module.
Defaults Records Shown
The number of records displayed in the Search tab at any one time. You can move between pages of registration records listed for each period using the navigation tools available.
Field Selection
Extra data columns to display in the Search tab. This is optional.
Here is an example of how your selections are shown in the Search tab:

When the details are as required, click Save Settings.
Use the Reload Settings button to cancel any changes you have made to these settings, i.e. reset the values as they were when you first accessed this form. The Reload Settings button only cancels changes if you have not already saved them.