
Add security groups to the SMS Gateway to control the use of SMS messages sent from iSAMS. A 'Default Security Group' is created by iSAMS Support which includes all users. Any new groups you create work in a top down method, filtering through the groups listed in SMS Group Management.
To create a security group:
- Select the iSAMS Control Panel from the left hand menu.
- Select the SMS Gateway listed within the applets available.
- Select SMS Group Management from the right hand menu to display this screen:

- Click Create Security Group. The Add Security Group window is displayed:
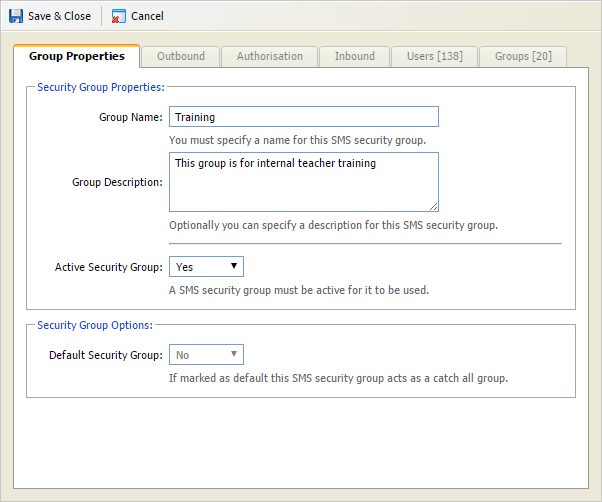
- In the Group Properties tab:
- Add a name and description for the group. You may find it useful to use a Group Name that reflects the users or user groups that you want to link to this security group. For example, name a security group 'Training' for the User Account group of 'Training' that you want to link to it.
- Select 'Yes' in Active Security Group.
- The Default Security Group field is greyed out. The 'Default Security Group' is always set as the default.
- Select the Outbound tab:
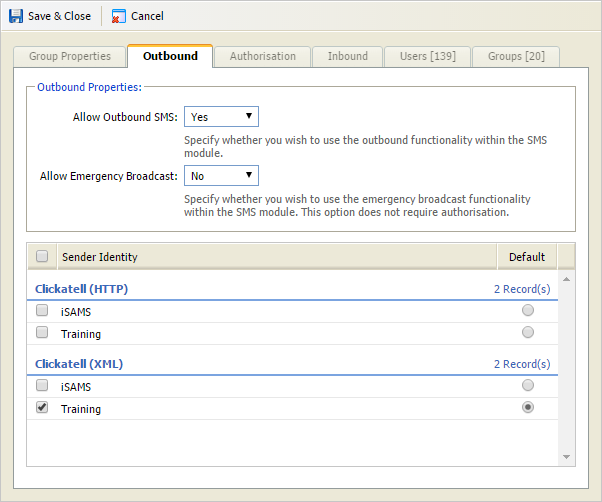
Configure the fields:- Allow Outbound SMS. Select whether this group can send outbound SMS messages from iSAMS. You may want to block some groups of users from sending messages.
- Allow Emergency Broadcast. Select whether this group can send emergency broadcasts.
- Sender Identity. Use the checkboxes to select the identities that users in this group can use to sign off SMS messages. SMS message recipients see the selected Sender Identity as the caller ID. More than one identity can be selected here and users can choose the most appropriate one when compiling SMS messages. Use the radio buttons in the Default column to select a default if more than one identity is being applied to the group.
- Select the Authorisation tab and use the drop down to mark whether any SMS messages sent by this group require authorisation. When 'Yes' is selected here all messages sit in the SMS Authorisation Queue and must be authorised before being forwarded onto the outbound provider.
- Select the Inbound tab and select whether this group can send inbound messages. This function is not currently in use.
- Use the Users and Groups tabs to select the individual users or groups of users that you want to include in this group.
- Click Save & Close. The new security group is listed in the SMS Group Management screen.