
Use the Email Wizard option in the pink drop down list send templated e-mails to applicants and their parents and contacts. This is useful for sending standard e-mails containing common fields and information, such as induction day details.
To send a templated e-mail, follow the steps below:
- In the Admissions module, select the Applicant tab.
- Use your preferred search method to find the applicant records that you want to work with. See Searching for Applicant and Parent Records for more information on searching for applicant records. The Applicant Records List is displayed:

- Use the checkboxes next to each Applicant's Name to select the applicant records that you want to work with. Check the box in the header bar to select all the records displayed.
- In the pink drop down list select Email Wizard.
Step 1 of the Email Wizard is displayed:
- Click Next.
A pop-up window is displayed. You are prompted The wizard is complete based on your selections. Do you want to continue with these choices? - Click OK.
The Send E-Mail window is displayed:
- Select the Message tab.
- Select an e-mail template from the Merge Template field.
The template is displayed in the text box. - Edit the template if you need to:
- Write the body of your e-mail in the free text box.
- Add fields using the drop down lists available, where required. In this example we need to change the salutation to a more appropriate 'STUDENT Field'.
- Use the standard toolbar to format your e-mail, as required.
- Select the Recipients tab. Use the checkboxes available to select the recipients of your e-mail. A key is displayed in this tab to help you.
An example of the Recipients tab is shown below:
- Use the Attachments tab to upload attachments to your e-mail, if required.
- Select the Options tab to enter additional recipients for your e-mail. You can also edit the reply address and the priority of your e-mail, as required.
- Click Preview E-Mail to preview and print your e-mail, if required:

This is useful for checking that the correct merge fields have been selected: - Use the drop down in the top right of the window to jump between pupils in the selection and preview the e-mail. Click Close Window once you have checked the e-mail.
- Click Send E-Mail. A Communication Summary is displayed for you to check that your e-mail has been sent.
- Click Cancel to return to the pupil records list.
E-Mail Parents and Applicant Contacts
Click Next.
Step 2 of the Email Wizard is displayed:
Select the contacts you wish to include in the e-mail correspondence:
Relation Type. Select the relatives who are to be contacted.
- Contact Group. Select contacts linked to a Custom Contact Group.
Filter your selections by:
Address Type. Filter contacts by their address type, such as 'Home' contacts. Only contacts with an address of this address type are sent the e-mail.
Contact Type. Filter contacts by their contact type, such as 'Billing' contacts. Only contacts marked as this contact type in contact records are sent the e-mail.
Click Next.
Step 3 of the Email Wizard displays the filtered contacts: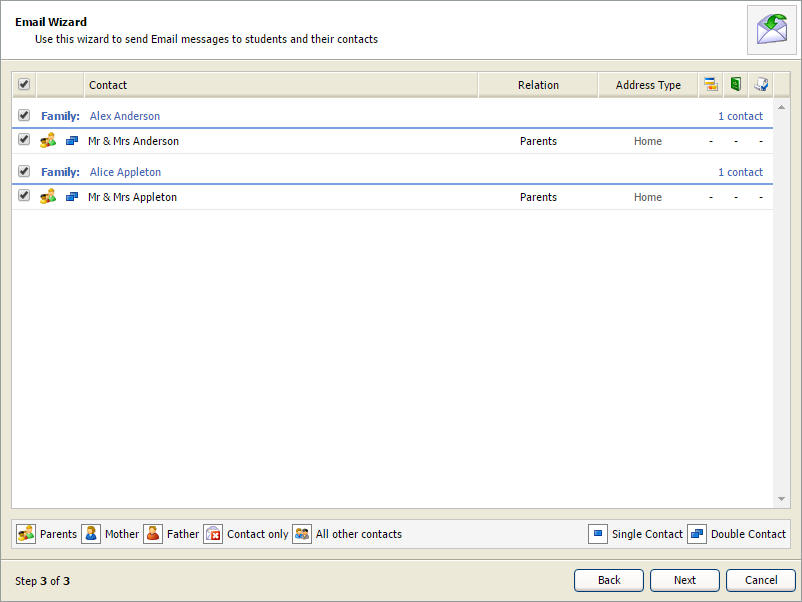
- Use the checkboxes available to select the recipients of your e-mail.
- Click Next.
A pop-up window is displayed. You are prompted The wizard is complete based on your selections. Do you want to continue with these choices? - Click OK.
The Send E-Mail window is displayed:
- Select the Message tab.
- Select an e-mail template from the Merge Template field.
The template is displayed in the text box. - Edit the template if you need to:
- Write the body of your e-mail in the free text box.
- Add fields using the drop down lists available, where required.
- Use the standard toolbar to format your e-mail, as required.
- Select the Recipients tab. Use the checkboxes available to select the recipients of your e-mail. A key is displayed in this tab to help you.
An example of the Recipients tab is shown below:
- Use the Attachments tab to upload attachments to your e-mail, if required.
- Select the Options tab to enter additional recipients for your e-mail. You can also edit the reply address and the priority of your e-mail, as required.
- Click Preview E-Mail to preview and print your e-mail, if required.
This is useful for checking that the correct merge fields have been selected: - Use the drop down in the top right of the window to jump between pupils in the selection and preview the e-mail. Click Close Window once you have checked the e-mail.
- Click Send E-Mail. A Communication Summary is displayed for you to check that your e-mail has been sent.
- Click Cancel to return to the pupil records list.