Use the Configuration tab in the Registration module to set up the future absence display and edit functions:
- Open the Registration module and select the Configuration tab.
- Select Future Absence Settings from the right hand menu to display this screen:
Work through the sections displayed:
Setting
Explanation
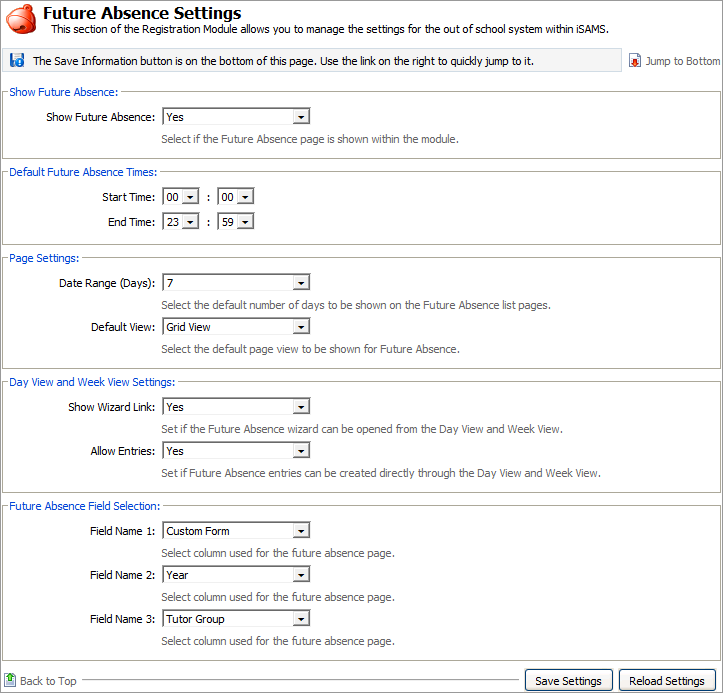
Show Future Absence
Use the drop down list to select whether the Future Absence tab is to be displayed and used in the module.
Default Future Absence Times
Use the drop down lists to select the default times for a day to start and end when marking future absence.
For example, for full boarding schools set this for a 24 hour day and for day schools set this for the length of the school day only. You can overwrite this time when you make a future absence entry.
Page Settings
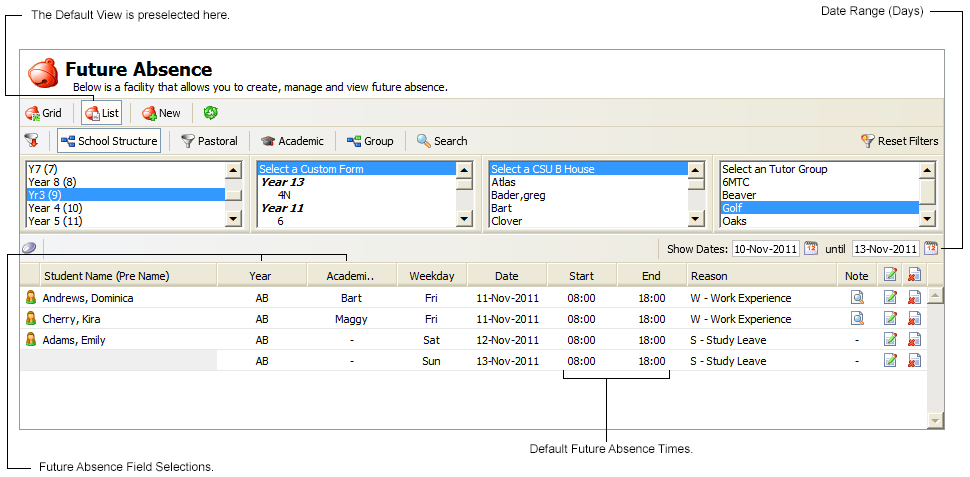
- Date Range (Days). Use the drop down list to select the default number of days to be displayed in the Future Absence tab. The number of days displayed runs from tomorrow's date. A low number of days works best when displaying the Future Absence tab in grid format.
Default View. Use the drop down list to select the display of the Future Absence tab when it is first opened:

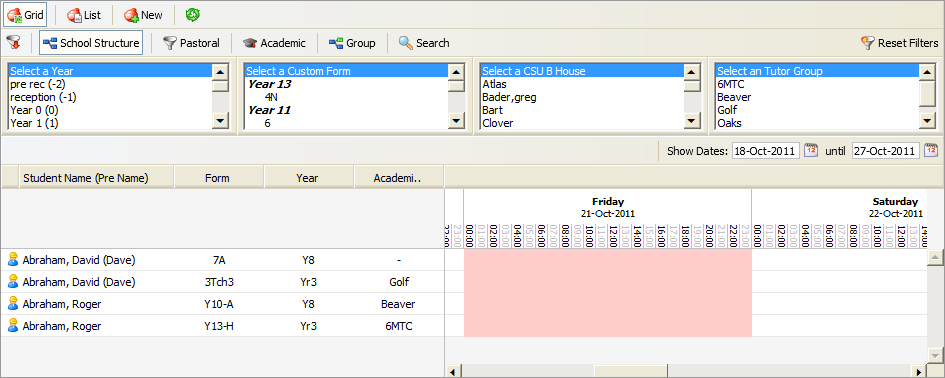
Use the list header to rearrange the information displayed if necessary:

Use this display to select students and mark them absent.

Day View and Week View Settings
- Show Wizard Link. Use the drop down list to select whether the Future Absence wizard can be opened from the Day View and Week View tabs. The use of wizards saves time as you do not have to open the Future Absence tab to create an entry.
- Allow Entries. Use the drop down list to select whether future absence can be marked from the Day View and Week View tabs.
Future Absence Field Selection
Use the drop down lists to select extra data columns to display in the Future Absence tab. This is optional.
- Click Save Settings once the details are as required.
An example is shown below of how your setting selections influence the Future Absence tab: