
Create a custom input field using the Admissions Custom Fields option. This allows you to record the information you wish to store from specified areas of the Admissions module. For example, you can use the option to create a 'Dietary Requirements' field to be shown in the Enquiry tab, allowing you to record dietary information when creating a new applicant record. This option is useful for facilitating the recording of extra applicant information.
Choose to:
- Add a custom field to the Admissions module.
- Add a duplicate of an existing custom field to another area in Admissions.
- Rearrange the order of custom fields.
- Edit an existing custom field.
- Delete an unwanted custom field.
Adding a Custom Field
Add a custom field using the Admissions Custom Fields option in the Configuration tab. You may wish to use this should you require extra fields for recording additional applicant information. You can choose the name and type of field and also where it is located in the applicant record.
To add a custom field, follow the steps below:
- In the Admissions module, select the Configuration tab.
- Select the Admissions Custom Fields option from the menu to the right of the screen.
The Custom Fields screen is displayed. An example is shown below:
- Click Add Custom Field.
A popup window is displayed. - Select the radio button next to New Custom Field to create a new custom field from scratch.
The fields available are shown in the example below:
Complete the following fields:
Field Explanation Display Name Specify a clear and concise name for the custom field. This is displayed in the applicant record. Record Area Use the drop down list to choose the tab or option in the applicant record you wish the field to be available in. Selecting 'Applicants Assessment' places the custom field in the Asst and Fees tab in an applicant record; this custom field can only be viewed from the Pupil Manager module. Record Section Use the drop down list to choose the section of the tab or option you wish the field to be available in. The list varies according to the Record Area you have selected. Custom Field Type Use the drop down list to select an appropriate field type for the custom field. For example, select 'Date' to create a field with a date selection tool. Default Value Specify the default holding text displayed in the custom field. Either:
Click Save & Close when finished.
or
Click Save & Add to continue adding custom fields.
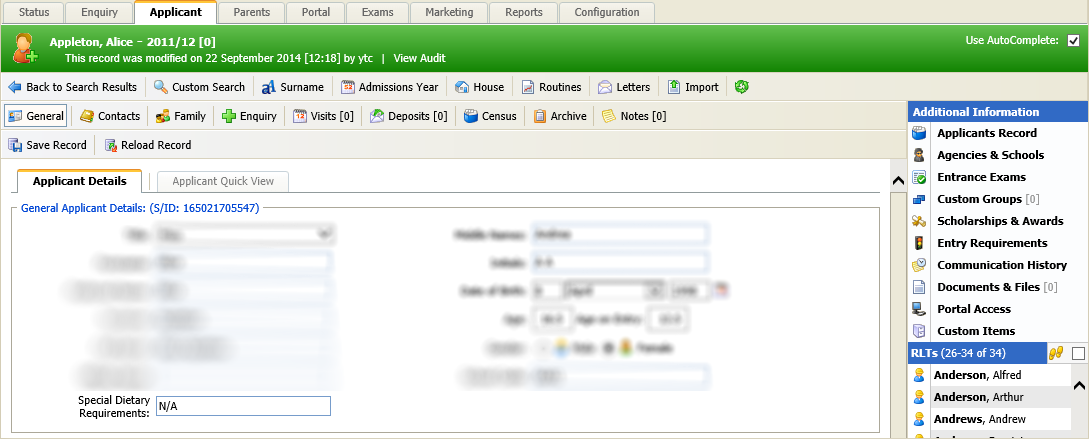
The new custom field is now listed in the Custom Fields screen and is available to use in applicant records:
Adding a Duplicate Custom Field
Add a duplicate of an existing custom field using the Admissions Custom Fields option in the Configuration tab. You may wish to use this should you require the custom field to be repeated in another area within Admissions. This helps when you wish to record the same information in another tab.
To duplicate a custom field, follow the steps below:
- In the Admissions module, select the Configuration tab.
- Select the Admissions Custom Fields option from the menu to the right of the screen.
The Custom Fields screen is displayed. An example is shown below: - Click Add Custom Field.
A popup window is displayed. - Select the radio button next to Existing Field to duplicate a custom field.
The fields available are shown in the example below:
Complete the following fields:
Field Explanation Existing Field Use the drop down list to choose the existing field you wish to duplicate. Record Area Use the drop down list to choose the tab or option in the applicant record you wish the field to be available in. Selecting 'Applicants Assessment' places the custom field in the Asst and Fees tab in an applicant record; this custom field can only be viewed from the Pupil Manager module. Record Section Use the drop down list to choose the section of the tab or option you wish the field to be available in. Either:
Click Save & Close when finished.
or
Click Save & Add to continue adding custom fields.
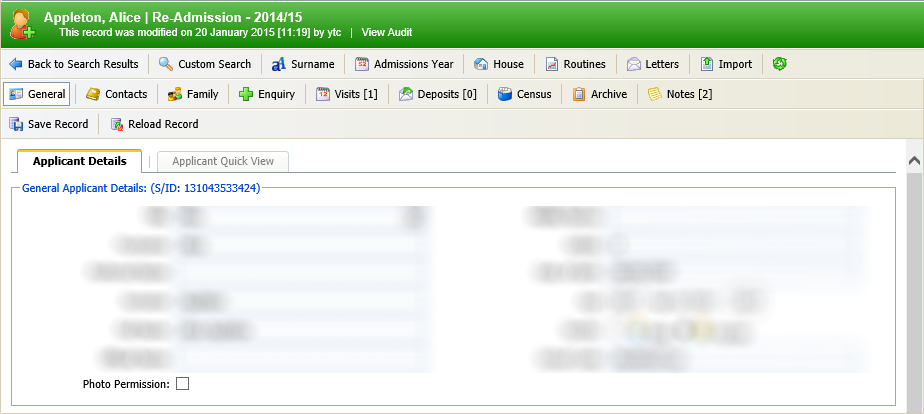
The new custom field is now listed in the Custom Fields screen and is available to use in applicant records:
Ordering Custom Fields
Rearrange the order of custom fields in record areas. You can use this to change the layout of custom fields.
To reorder custom fields, follow the steps below:
- In the Admissions module, select the Configuration tab.
- Select the Admissions Custom Fields option from the menu to the right of the screen.
The Custom Fields screen is displayed, an example is shown below: - Click Order Items by the record area you wish to reorder.
A popup window is displayed. An example is shown below:
- Click on the custom field you wish to reorder.
- Use the arrows to change the custom field's position.
- Click Save & Close when finished.
Edit a Custom Field
Edit an existing custom field using the Admissions Custom Fields option in the Configuration tab. This is useful should you wish to change the name, default holding text or type of field.
To edit a custom field, follow the steps below:
- In the Admissions module, select the Configuration tab.
- Select the Admissions Custom Fields option from the menu to the right of the screen.
The Custom Fields screen is displayed, an example is shown below: - Click
 next to the custom field you wish to edit.
A popup window is displayed, an example is shown below:
Amend the following fields:
Field Explanation Display Name Specify a clear and concise name for the custom field. This is displayed in the applicant record. Default Value Specify the default holding text displayed in the custom field. Custom Field Type Use the drop down list to select an appropriate field type for the custom field. For example, select 'Date' to create a field with a date selection tool. Click Save & Close when finished. To revert to previously saved settings, click Cancel.
Delete a Custom Field
Delete a custom field using the Admissions Custom Fields option in the Configuration tab. For example, use this to remove a custom field that you have created in error.
Deleting a custom field that is in use causes all associated data to be lost.
To delete a custom field, follow the steps below:
- In the Admissions module, select the Configuration tab.
- Select the Admissions Custom Fields option from the menu to the right of the screen.
The Custom Fields screen is displayed, an example is shown below: - Click
 next to the custom field you wish to delete.
A popup window is displayed, you are prompted Are you sure you want to delete this custom field? - Make the appropriate selection.
The custom field is removed from the Admissions module.