
Tracking Object Wizards
Use the Tracking Object Wizards for configuring Tracking Objects quickly. Wizards are available for each of the Tracking Objects options.
| It is important that Tracking Objects are setup before you start using Tracking Models. This ensures that you use the full functionality of the Tracking Manager Module. |
Follow the stages in each of the Wizards to start using Tracking Objects in your Tracking Models.
The following Tracking Objects Wizards are available for you to work through:
- Style Wizard. Use to setup Tracking Styles to apply to the data in your Tracking Models. Tracking Styles change the way that the data in your Tracking Models is displayed. Setup a different Tracking Style for each type of data that you link to the Tracking Manager Module. See Stage 1: Style Wizard for more information.
- Sorting Wizard. Use to setup Sorting Objects to sort the data in your Tracking Models. It is recommended that you list all data in order of merit. For example, choose to list effort grades of '1' and exam grades of 'A' first. This helps you to compare information gathered from different sources. See Using the Sorting Wizard for more information.
- Gradeset Wizard. Use to setup Gradeset Objects. Apply Gradeset Objects in your Tracking Models to translate numerical data into grades, marks or targets which the Tracking Manager Module recognises. For example, choose to translate results linked from the Exams Manager Module of between '80% and 100%' into a grade 'A'. This helps you to compare information gathered from different sources by giving them common values. See Using the Gradeset Wizard for more information.
- Transpose Wizard. Use to setup Transpose Objects. Apply Transpose Objects in your Tracking Models to transpose the data into common values. Use common numerical values to make calculations in your Tracking Models, such as calculating average marks. See Using the Transpose Wizard for more information.
Stage 1: Style Wizard
Use the Style Wizard as a quick way to setup the Style and Design Objects option. You are taken through steps to create a Tracking Style and then add a number of Style Logic to it. This ensures that you complete all the steps required to start using Tracking Styles in your Tracking Models.
Tracking Styles change the way that the data is displayed in your Tracking Models. Setup a different Tracking Style for each type of data that you link to the Tracking Manager Module.
Use Stage 2 of the Style Wizard to add Style Logic to your Tracking Style. Style Logic are the elements which make up each Tracking Style. For example, use a Tracking Style for external exam results which contains a Style Logic for each grade awarded. Setup the Style Logic to display all 'A' grades as green and all 'E' grades as red in your Tracking Model.
To setup the Style Wizard, follow the steps below:
1. In the Configuration tab, select Style and Design Objects from the right hand menu.
The Style and Design Objects screen is displayed.
2. Click  in the top left of the screen.
Stage 1 of the Style Wizard is displayed. An example is shown below:

3. Complete the sections available:
Section | Explanation |
Style Details | Style Name. Use a clear, concise and unique name for your Tracking Style. This is displayed when creating columns in Tracking Models. Style Code. Choose to amend the default code provided, if required. This is displayed when managing columns in Tracking Models. Style Active. Select Yes to start using the Tracking Style. Active Tracking Styles are identified by the |
Style Defaults | Default Style. Select Yes for this Tracking Style to be preselected when you create new columns in Tracking Models. Default Tracking Styles are identified by the Global Style. Select Yes for all Tracking Manager Module users to access this Tracking Style. Select No for the Tracking Style to be listed as Private (only you can use a Tracking Style listed as Private). |

4. Click Next.
Stage 2 of the Style Wizard is displayed.
Stage 2: Style Wizard
To add Style Logic to your Tracking Style, follow the steps below:
1. Click  in Stage 2 of the Style Wizard.
The Create Style Logic window is displayed. An example is shown below:

2. Complete the sections available in the Logic Details tab:
Section | Explanation |
Logic Details | Logic Operation. Use the drop down list to select a term for either 'Numeric' or 'Text' data. This is applied to data in your Tracking Model. Numeric Value. This is only displayed when using 'Numeric' Logic Operations. Enter the value to be used with the Logic Operation. For example, enter a value of '80' with a Logic Operation of ''Greater Than'. The Style Logic will filter all data with a value greater than 80. Logic Value. This is only displayed when using 'Text' Logic Operations. Enter the value to be used with the Logic Operation. You can enter more than one term, if required. Separate multiple terms with a comma. For example, enter values of 'A,B' with a Logic Operation of 'Contains'. The Style Logic filters all data which contains either an A or a B. |
Logic Options | Select Yes to start using the Style Logic. Selecting No makes the Style Logic inactive and you are unable to use it. |
3. Select the Style Elements tab. Use the sections available to setup the colour styling for the text, background and border of your Style Logic. An example of the Style Elements tab is shown below:

4. In the Text Style Elements section, click  to select a colour for the text of your Style Logic.
A popup window is displayed, an example is shown below:

Use your preferred method for selecting a colours.
Either:
a) Use your mouse to scroll up and down the central colour palette and select a colour to work with.
b) Move the circle in the left hand box to select a hue for your Style Logic.
or
Enter RGB values in the fields available.
or
Enter HSB values in the fields available.
or
Enter a hexadecimal code in the field available.
Your selected colour is displayed in the top right of the popup window.
Click on the Create Style Logic window once you have made your selection. This removes the popup window.
5. Select the Text Alignment for the Style Logic. This defaults to 'Center', adjust this if required using the options in the drop down list.
6. Continue to complete the sections in the Style Elements tab to setup the styling for:
- Cell Style. Select a colour, leave the cell padding as the default selection.
- Border Style. Select a thickness, style and colour.
Complete these sections in the same format as setting up Text Style.
7. Click ![]() Save & Close. Add more Style Logic, as required.
Save & Close. Add more Style Logic, as required.
The Style Logic you add are displayed in Stage 2 of the Style Wizard. An example is shown below:

Icons are available for you to use in Stage 2 of the Style Wizard, if required.
These are explained in the table below:
Icon | Use to... |
| Arrange the order that Style Logic are listed. Choose to list the most used at the top of the list. See Arrange Style Logic for more information. |
| Edit the properties of the Style Logic. See Edit Style Logic for more information. |
| Delete the Style Logic if it is not required. See Delete Style Logic for more information. |
| Refresh the display to include any changes you have made. |


8. Click Next once you have complete the list of Style Logic.
A window confirming that you have successfully completed the Style Wizard is displayed. An example is shown below:

9. Click Finish. Your Tracking Style is displayed in the Style and Design Objects screen. An example is shown below:

Use the Style Wizard to add more Tracking Styles, as required.
Using the Sorting Wizard
Use the Sorting Wizard as a quick way to setup the Sorting and Ordering Objects option. Choose the order that data in the module is listed. It is recommended that you list all data in order of merit. For example, choose to list effort grades of '1' and exam grades of 'A' first. This helps you to compare information gathered from different sources.
The Sorting Wizard takes you through a series of steps to create a Sorting Object and then add Sorting Elements to it. This ensures that you complete all the steps required to start sorting the columns in your Tracking Models.
Use Stage 2 of the Sorting Wizard to add Sorting Elements to your Sorting Object. Each Sorting Object consists of Sorting Elements. Use a different Sorting Element for each of the terms used in the Sorting Object. For example, use a Sorting Object for effort grades which contains Sorting Elements for each grade awarded. Setup the Sorting Elements to list all '1' effort grades first and all '5' effort grades last.
To setup the Sorting Wizard, follow the steps below:
1. In the Configuration tab, select Sorting and Ordering Objects from the right hand menu.
The Sorting and Ordering Objects screen is displayed.
2. Click  in the top left of the screen.
Stage 1 of the Sorting Wizard is displayed. An example is shown below:
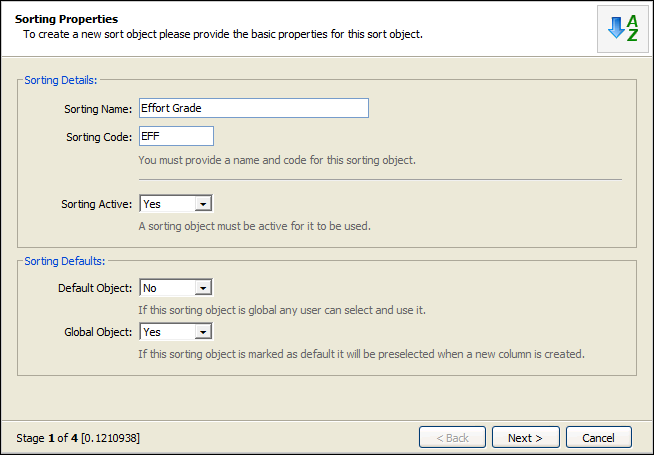
3. Complete the sections available:
Section | Explanation |
Sorting Details | Sorting Name. Use a clear, concise and unique name for your Sorting Object. This refers to the data you want to sort in the module, for example 'Effort Grade'. This is displayed when creating columns in Tracking Models. Sorting Code. Choose to amend the default code provided, if required. This is displayed when managing columns in Tracking Models. Sorting Active. Select Yes to start using the Sorting Object. Active Sorting Objects are identified by the |
Style Defaults | Default Object. Select Yes for this Sorting Object to be preselected when you create new columns in Tracking Models. Default Sorting Objects are identified by the Global Object. Select Yes for all Tracking Manager Module users to access this Sorting Object. Select No for the Sorting Object to be listed as Private (only you can use a Sorting Object listed as Private). |
4. Click Next.
Stage 2 of the Sorting Wizard is displayed. An example is shown below:
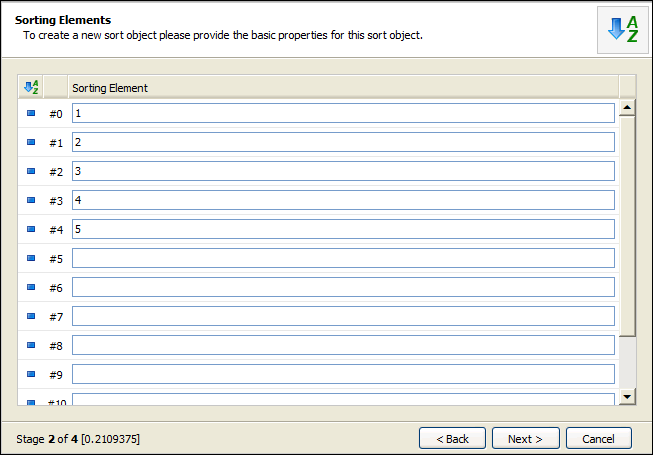
5. Enter the terms used in the data you want to sort. These terms are referred to as Sorting Elements. Complete the fields in order of merit with the highest value Sorting Element in the field marked #0.
6. Click Next once you have completed the Sorting Element fields.
A window confirming that you have successfully completed the Sorting Wizard is displayed. An example is shown below:
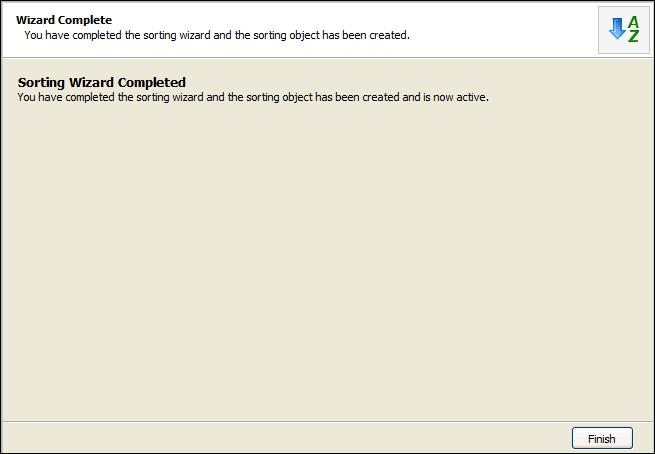
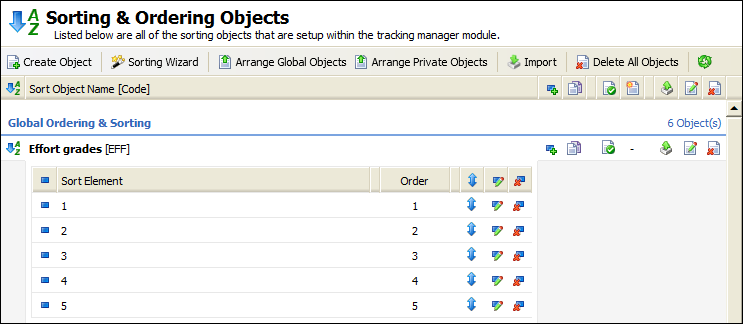
7. Click Finish. Your Sorting Object is displayed in the Sorting and Ordering Objects screen. An example is shown below:
Use the Sorting Wizard to add more Sorting Objects, as required.
Using the Gradeset Wizard
Use the Gradeset Wizard as a quick way to setup the Gradeset Objects option. The Gradeset Wizard takes you through a series of steps to create a Gradeset Object and then add Gradeset Elements to it. This ensures that you complete all the steps required to start using Gradesets Objects in your Tracking Models.
Apply Gradeset Objects in your Tracking Models so that columns have common values. This helps you to compare information gathered from different sources. The original data is still available to view in your Tracking Models.
Use Stage 2 of the Gradeset Wizard to add Gradeset Elements to your Gradeset Object. Each Gradeset Object consists of Gradeset Elements. Use a different Gradeset Element for each range of values you want to grade in the Gradeset Object. For example, use a Gradeset Object to translate percentage results into grades. Setup the Gradeset Elements to list all gradeset values between '80 and 100' as a grade 'A', continue to setup Gradeset Elements for all percentage results. Apply the Gradeset Object to the data in your Tracking Model. You can then compare the results with other grade data listed in your Tracking Model.
To setup the Gradeset Wizard, follow the steps below:
1. In the Configuration tab, select Gradeset Objects from the right hand menu.
The Gradeset Objects screen is displayed.
2. Click  in the top left of the screen.
Stage 1 of the Gradeset Wizard is displayed. An example is shown below:

3. Complete the sections available to setup your Gradeset Object:
Section | Explanation |
Gradeset Details | Gradeset Name. Use a clear, concise and unique name for your Gradeset Object. This refers to the data you want to grade in the module, for example 'Credit scores'. This is displayed when creating columns in Tracking Models. Gradeset Code. Choose to amend the default code provided, if required. This is displayed when managing columns in Tracking Models. Gradeset Active. Select Yes to start using the Gradeset Object. Active Gradeset Objects are identified by the |
Gradeset Defaults | Global Object. Select Yes for all Tracking Manager Module users to access this Gradeset Object. Select No for the Gradeset Object to be listed as Private (only you can use a Gradeset Object listed as Private). Default Object. Selecting Yes preselects this Gradeset Object when you choose to use Gradeset Objects to make column adjustments in your Tracking Models. Default Gradeset Objects are identified by the |
4. Click Next.
Stage 2 of the Gradeset Wizard is displayed. An example is shown below:

5. Use the fields available to add Gradeset Elements to your Gradeset Object. Complete the fields in order of merit with the highest value Gradeset Element at the top of the list.
a) Enter the minimum and maximum value (Min Value and Max Value) used in the data you want to grade. For example, enter minimum and maximum values of '200' and '1000' for the number of 'credit scores' a pupil receives.
b) Enter a Gradeset Value to represent the value range you have listed. For example, for the value range of '200' to '1000' credits a pupil is awarded 'Platinum Champion'.
6. Click Next once you have completed the Gradeset Element fields.
A window confirming that you have successfully completed the Gradeset Wizard is displayed. An example is shown below:

7. Click Finish. Your Gradeset Object is displayed in the Gradeset Objects screen. An example is shown below:

Using the Transpose Wizard
Use the Transpose Objects Wizard as a quick way to setup the Transpose Objects option. The Transpose Wizard takes you through a series of steps to create a Transpose Object and then add Transpose Elements to it. This ensures that you complete all the steps required to start using Transpose Objects in your Tracking Models.
Transpose data linked to the Tracking Manager Module into common values, such as grades, numerical values or targets. Use common numerical values to make calculations in your Tracking Models, such as calculating average marks. The original data is still available to view in your Tracking Models if you need it.
Use Stage 2 of the Transpose Wizard to add Transpose Elements to your Transpose Object. Each Transpose Object consists of Transpose Elements. Use a different Transpose Element for each value you want to change in the Transpose Object. For example, setup a Transpose Object for effort grades. Setup Transpose Elements for each effort grade, changing a high effort grade of '1' to a value of '10' and a low effort grade of '5' to a value of '2'. Setup another Transpose Object for exam grades, transposing a high grade of 'A' to a value of '10' and so on. Apply the Transpose Objects to the data in your Tracking Model. You can then calculate an average of the numerical values listed and transpose your findings back to a grade to give a pupil's overall grade for the year.
To setup the Transpose Wizard, follow the steps below:
1. In the Configuration tab, select Transpose Objects from the right hand menu.
The Transpose Objects screen is displayed.
2. Click ![]() in the top left of the screen.
in the top left of the screen.
Stage 1 of the Transpose Wizard is displayed. An example is shown below:
![]()
3. Complete the sections available to setup your Transpose Object:
Section | Explanation |
Transpose Details | Transpose Name. Use a clear, concise and unique name for your Transpose Object. This refers to the data you want to change in the module, for example 'Scores'. This is displayed when creating columns in Tracking Models. Transpose Code. Use a unique code. Choose to amend the default code provided, if required. This is displayed when managing columns in Tracking Models. Transpose Active. Select Yes to start using the Transpose Object. Active Transpose Objects are identified by the |
Transpose Defaults | Global Object. Select Yes for all Tracking Manager Module users to access this Transpose Object. Select No for the Transpose Object to be listed as Private (only you can use a Transpose Object listed as Private). Default Object. Selecting Yes preselects this Transpose Object when you choose to use Transpose Objects to make column adjustments in your Tracking Models. Default Transpose Objects are identified by the |
4. Click Next.
Stage 2 of the Transpose Wizard is displayed. An example is shown below:
![]()
5. Use the fields available to add Transpose Elements to your Transpose Object. Complete the fields in order of merit with the highest value Transpose Element at the top of the list.
a) Enter the grade that you want to transpose in the Transpose Element field.
b) Enter a Transpose Value for the grade. For example, for the grade 'A*' enter a Transpose Value of '8'.
6. Click Next once you have completed the Transpose Element fields.
A window confirming that you have successfully completed the Transpose Wizard is displayed. An example is shown below:
![]()
7. Click Finish. Your Transpose Object is displayed in the Transpose Objects screen. An example is shown below:
![]()